
When I first started hunting, my husband and I were among the many hunters who left the work of meat processing to professionals because we had no space to do it. Then we moved into a place that did and took the plunge into the world of DIY butchering. We quickly found that the pros of butchering your own game far outweigh the cons, and we’ve been processing our own meat ever since!
If you’re thinking about diving in as well, consider the following:
Pros:
- Savings. Your butchering equipment will end up paying for itself within a few hunting seasons. Obviously the type of appliances you buy and number of animals you typically harvest each year will influence the “when”, but I think it’s safe to say that the average hunter who plans on hunting for the foreseeable future can pay off the cost of equipment within three seasons by what he saves in butcher fees.
- Peace of mind. While some commercial processors practice the upmost integrity in ensuring that the meat you drop off is the same meat you pick up, this is not always the case. Obviously you can do your research, ask questions, and get to know your local butchers. But if you cut and grind your own, there’s no question about whose it is.
- Control. Along the same lines, you can control exactly how long your meat is aged, as well as what goes into your hamburger and sausage (i.e., what type of fat/spices are used and how much) if you do it all yourself.
- Education. Once you’ve educated yourself on cutting, chopping, grinding, mixing, and storage techniques, you can turn the processing process into a family affair and teaching

Our 3-year-old helps label bags by writing the letter “I” for Italian Sausage opportunity. Even littles can learn to appreciate what it takes to get meat on the table and can provide help appropriate to their skill levels.
- Personal satisfaction. Consider it an extension of hunting: You work hard, put in the time, sweat, and effort, and the result is an edible trophy that has your name all over it, from field to freezer.
Cons:
- Initial Investment. At a minimum, you’ll need a high-quality meat grinder, set of butcher knives, and butcher paper. If you plan on making sausage and want to do so on something other than your kitchen counter (and get it packaged all nice and pretty), you’ll need to add a meat mixer, butcher table, and vacuum sealer to the list. The final investment price will be anywhere from $700 to $1500, depending on how gung ho you’re going.
- Time. Just start mentally preparing yourself at the beginning of your hunt, knowing that even once an animal is down and gutted, you still have hours left of skinning, cutting, grinding and packing to look forward to. Of course you can stretch the process out over a period of time, but it’s definitely not as luxurious as leaving it all in the hands of an expert.
- The mess. Whether your butchering space is big or small, sophisticated or thrown together, plan on it being a mess. Butchering game is not for the squeamish at heart. Enough said.
- Amateur skills. Unless you’ve been professionally trained, don’t expect your cuts to be as fancifully filleted as a commercial butchers. If you are not willing to learn and practice the necessary skills (or your cutting skills just suck), you’re not likely to be pleased with the final results. What’s more, the way your meat is handled and cut will impact how its texture and taste—and that’s not something you want to screw around with.
What We Use:
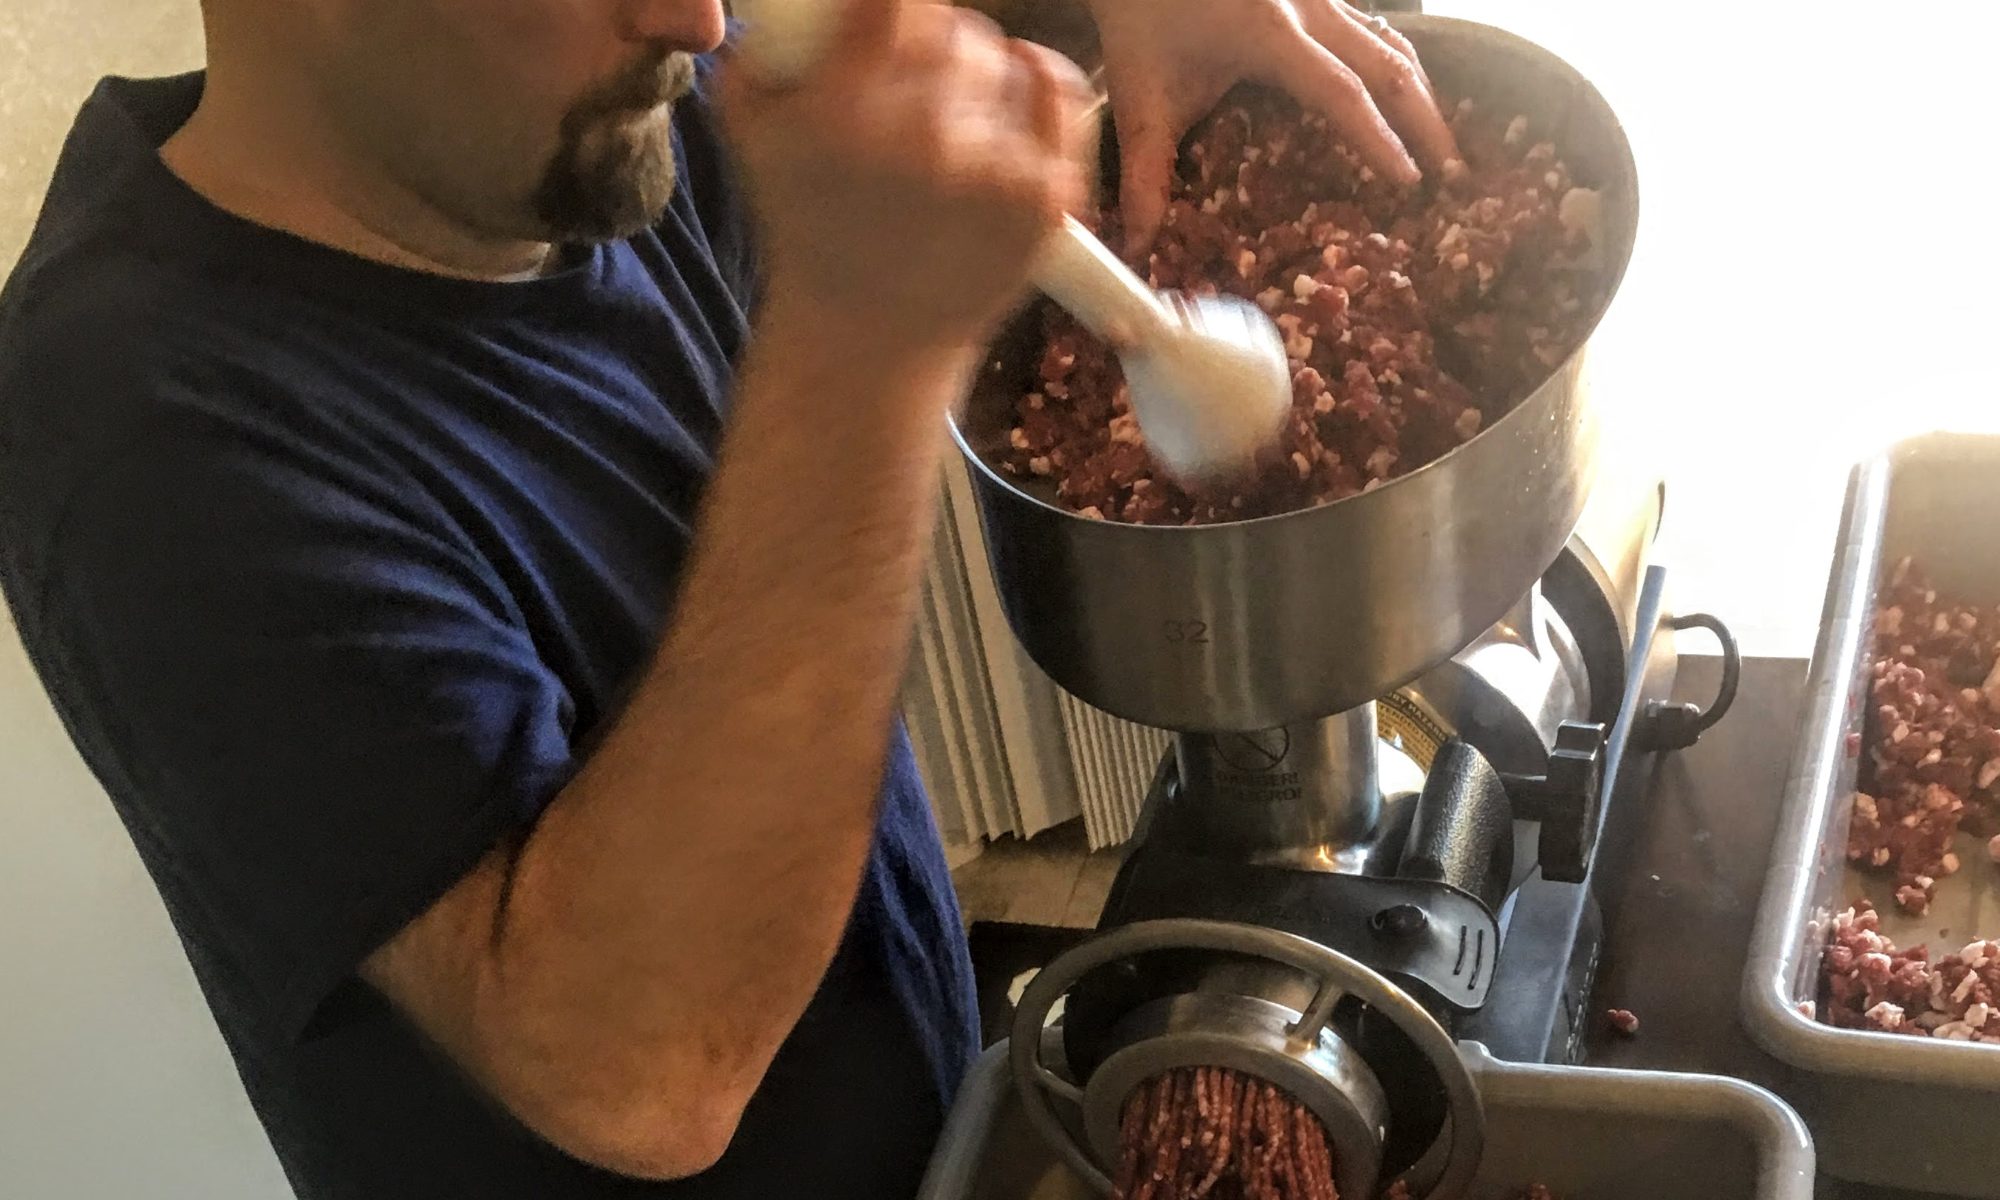
Grinder: We use Cabela’s Carnivore heavy duty grinder. There are cheaper options out there; just be sure to get one that’s electric, stainless steel, commercial grade, and at least .75 HP for best—and longer-lived—results. The machine’s pounds-per-minute capacity deserves special consideration, too. You don’t want to get stuck grinding the day away.
Butchering Tools: Victorinox knives are awesome. A meat hook is also super helpful.
Meat Mixer: We went with Cabela’s heavy-duty mixer (we love it–it’s a beast!)
Butcher Table: Ours is homemade, but if you’re not the handy type, you can purchase one online or find a used one.
Vacuum Sealer & Bags: This Preservac is pretty basic, but has served us pretty well so far. When it eventually bites the dust, we will definitely be switching to one of Cabela’s vacuum sealers.
money-saving tips:
- Ask friends and family to donate to your meat processing equipment fund in lieu of Christmas gifts.
- Check with the meat department of your favorite grocery store about pork trimmings and ask if they offer a bulk discount. Some are willing to set large amounts aside for customers. Others have a first-come, first-serve policy (so plan ahead if you go this route).
- Buy sausage-making spices in bulk. Our local natural foods store has an excellent bulk section and savings are huge. I like to measure out spices into a large shaker (or old extra large spice container) and let the kids help by shaking it as hard as they can.
- Refurbish a second-hand table by cutting a piece of laminate to size and gluing it on. Make sure that the table is the correct height, though. Your back will hate you if spend your butchering time all hunched over.
- If you can’t afford a vacuum sealer right off the bat, you can wrap meat tightly first in plastic, then with a protective layer of butcher paper.
Other recommendations
- Hard plastic tubs for batching and catching meat
- Cutting Deer Right instructional DVD – this was a game-changer for us (no pun intended)
- Meat scale for weighing
- Casings if you decide to make sausage links
Happy butchering!

Related: How to Make Bulk Venison Breakfast Sausage
This post may contain affiliate links, which means I may earn a small commission if you buy products through links on my site.